Advanced Swirl Techniques for Cold Process Soap That Won't Muddy
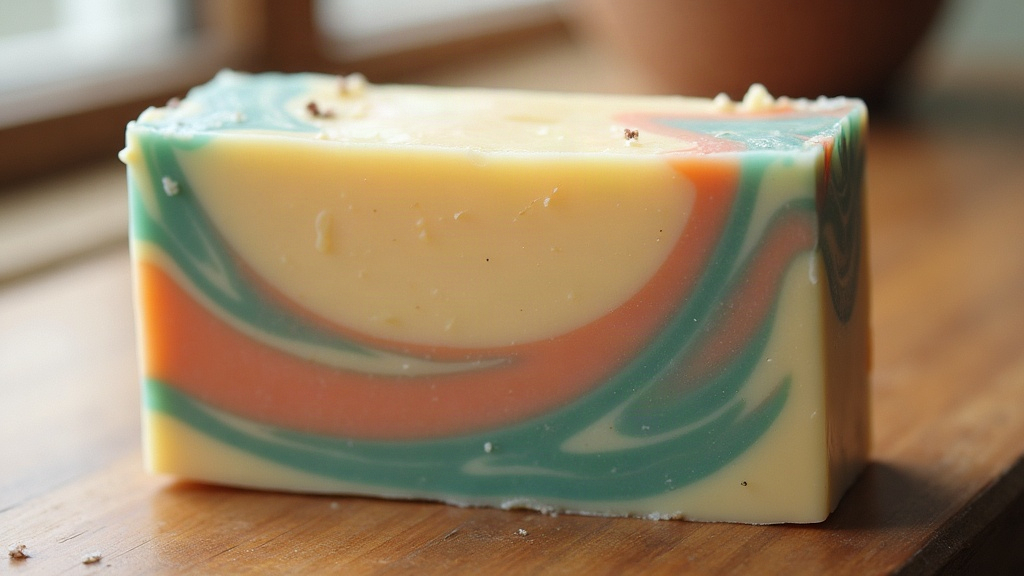
Why Swirls Turn Muddy in the First Place
Before you even think about layering techniques, you need to understand the three real culprits behind muddy cold process soap:
- Trace is too thick. Once your batter hits medium-to-thick trace, colors stop sitting in neat layers and just smear into each other the moment you swirl.
- Too many colors fighting for space. Pour three or more saturated colors carelessly and nine times out of ten they collapse into brown or gray mush.
- Overmixing after pouring. Every extra pass of a skewer or spatula blends the pigment a little more. Swirls need fewer movements than most people assume, often just one.
If your batter has already blown past thin trace before you’ve even added color, stop right there. Thin it with a small splash of distilled water, or next time, slow down your stick blender pulses from the start.
Rule #1: Keep Your Base at Thin, Pourable Trace
Trace consistency is the single biggest factor in getting crisp swirls. You’re aiming for something that looks like warm pudding or thin pancake batter, pourable in a steady ribbon, not plopping out in dollops.
- Split your batch and color each portion before you reach medium trace.
- Pulse your stick blender in short 1-2 second bursts, checking consistency after each one.
- Working with slow-tracing oils (olive oil, high liquid-oil recipes)? You’ve got more time on your side. Use it to pour with intention instead of racing the clock.
Color Separation: Use Contrast, Not Just Variety
A lot of muddy results come down to picking colors that sit too close together in value (how light or dark they are). Instead, try this:
- Pair one dark, one light, and one mid-tone accent, say, charcoal, uncolored white, and a single saturated teal.
- Steer clear of complementary pairs (purple next to yellow, for instance) touching directly in a swirl. They turn gray almost on contact.
- Leave one portion of batter uncolored or just barely tinted. That neutral layer works as a buffer, keeping bold colors from blending straight into one another.
Layering Techniques That Preserve Definition
The Funnel Pour Method
Hold a funnel just above the mold surface and pour each color through it, alternating colors in the same spot to build vertical layers. The funnel slows everything down and cuts out splashing, so layers stack instead of merging.
In-the-Pot (ITP) Swirl, Done Carefully
- Pour your colors into the main pot as distinct pools. Don’t stir them together first.
- Use a spatula for one slow figure-eight or spiral motion. Not a vigorous stir, just one pass.
- Pour straight into the mold in a single continuous motion. The swirl pattern gets locked in by the pour itself, so fight the urge to go back in and “fix” it with more stirring. That’s exactly what ruins it.
Drop Swirl Technique
Pour thin alternating layers of color directly into the mold. Then take a thin skewer, drop it straight down, and pull it straight back up, no dragging sideways. Repeat this in a grid pattern across the mold. Because the tool displaces batter instead of smearing it, you get clean vertical swirls.
Hanger Swirl (In-Mold)
Bend a wire coat hanger into a zigzag shape. Once your layered colors are poured into the mold, pull the hanger through in one direction, one pass only. A second pass is almost always the moment things turn muddy at this stage.
Temperature Matters More Than You Think
Batter that’s too hot speeds up trace mid-swirl, which locks in your movements before you’ve finished pouring. Keep your lye solution and oils in the 95-110°F (35-43°C) range for standard recipes. Cooler temperatures buy you more working time, which matters a lot when you’re using fragrance oils that are known to speed up trace.
Fragrance and Additive Considerations
Some fragrance oils will rice or accelerate trace almost the second you add them, wrecking your swirl before you’ve even started pouring. Before committing to a big batch:
- Test the fragrance oil in a small 100g sample first, just to see how it behaves.
- If it accelerates trace, either drop your working temperature or save that scent for a single-pour design instead of a multi-color swirl.
- Poorly dispersed micas can also cause streaking that looks a lot like muddying. Always pre-disperse mica in a small amount of oil before mixing it into your batter.
Troubleshooting Quick Reference
- Swirl looks brown throughout: colors were too close in value, or the batter got overmixed after pouring.
- Swirl collapsed into one layer: trace was too thin, so colors sank before the soap set.
- Streaky, uneven color: mica wasn’t dispersed properly before it went into the batter.
Final Thoughts
Crisp, professional-looking swirls come down to three habits: pour at thin trace, pick colors with genuine contrast, and touch the batter as little as humanly possible once it’s in the mold. Get these fundamentals locked down before you start adding more colors or fancier tools. A simple technique done well will beat a complicated one rushed through muddy batter, every single time.